So you have received your brand new Photologo and you can’t wait to start signing your photos, but don’t know where to get started? I got you covered!
In this quick tutorial, I will show you the easiest way to apply your logo into your digital photos using Adobe Photoshop in a few quick steps, to protect them against unauthorized use and start building your personal brand.
Getting Your Signature Logo:
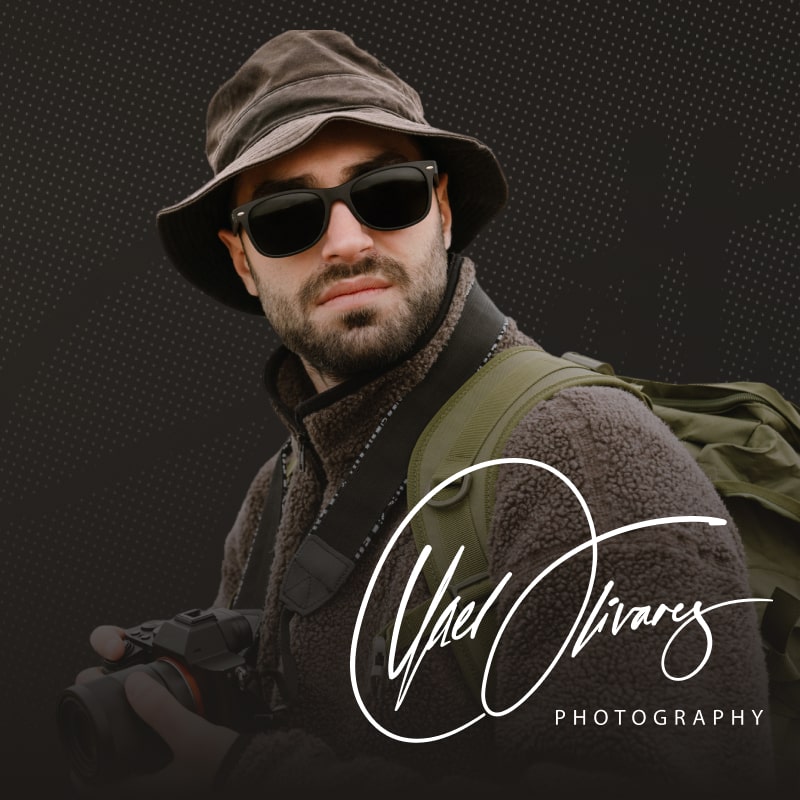
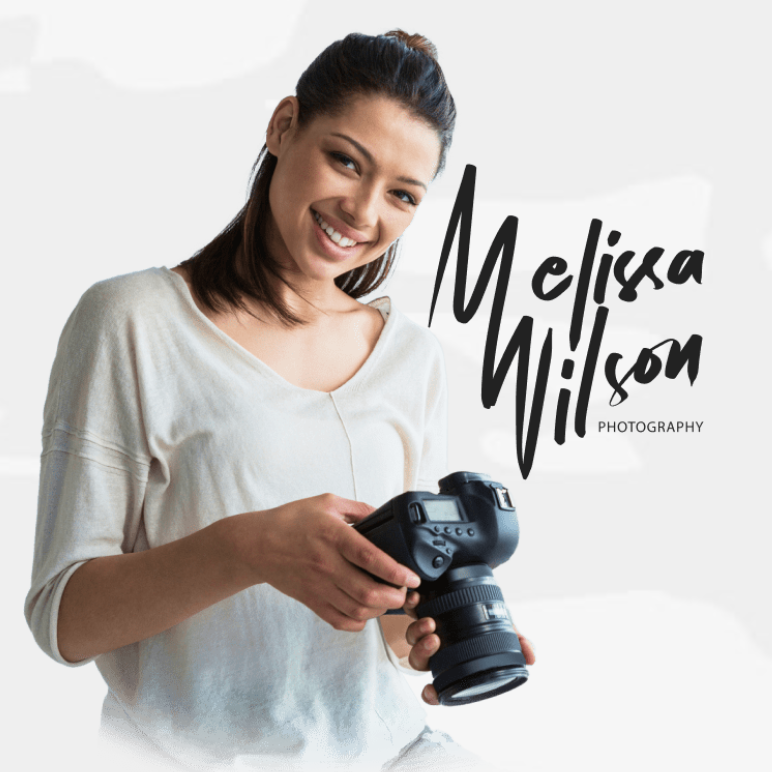
Hiring a calligrapher: once a pricey option (think $500+), can now be yours for just $39! Get yours crafted by a pro calligrapher in 2-3 days. Below are some examples from our studio. Click here to get your unique Signature Logo.


If you already have some experience using Photoshop, this will be a simple process.
If you don’t, there’s no reason to get intimidated by the complex interface.
Even though Photoshop is not built for this purpose, you can still manually insert your watermark into each image, using the tools you usually use to insert photos and texts within the images you work in Photoshop (SPOILER: with Photopolish you’ll have the ability to watermark many pictures with a single click, lightning-fast processing, plus a whole lot of awesome features).
Step by Step
1. First of all, install and launch Photoshop: Drag and drop the image you want to sign into the dashboard. As an alternative, your can click on File > Open in the main menu and open the image.
Here’s a quick guide of the tools you’ll need:

2. Open the image with the signature in Photoshop (File menu> Open): Press the keyboard combination Ctrl+A to select it and then press Ctrl+C to copy it. Then go to the tab where you have the image file you want to sign and paste your logo using the shortcut Ctrl+V.
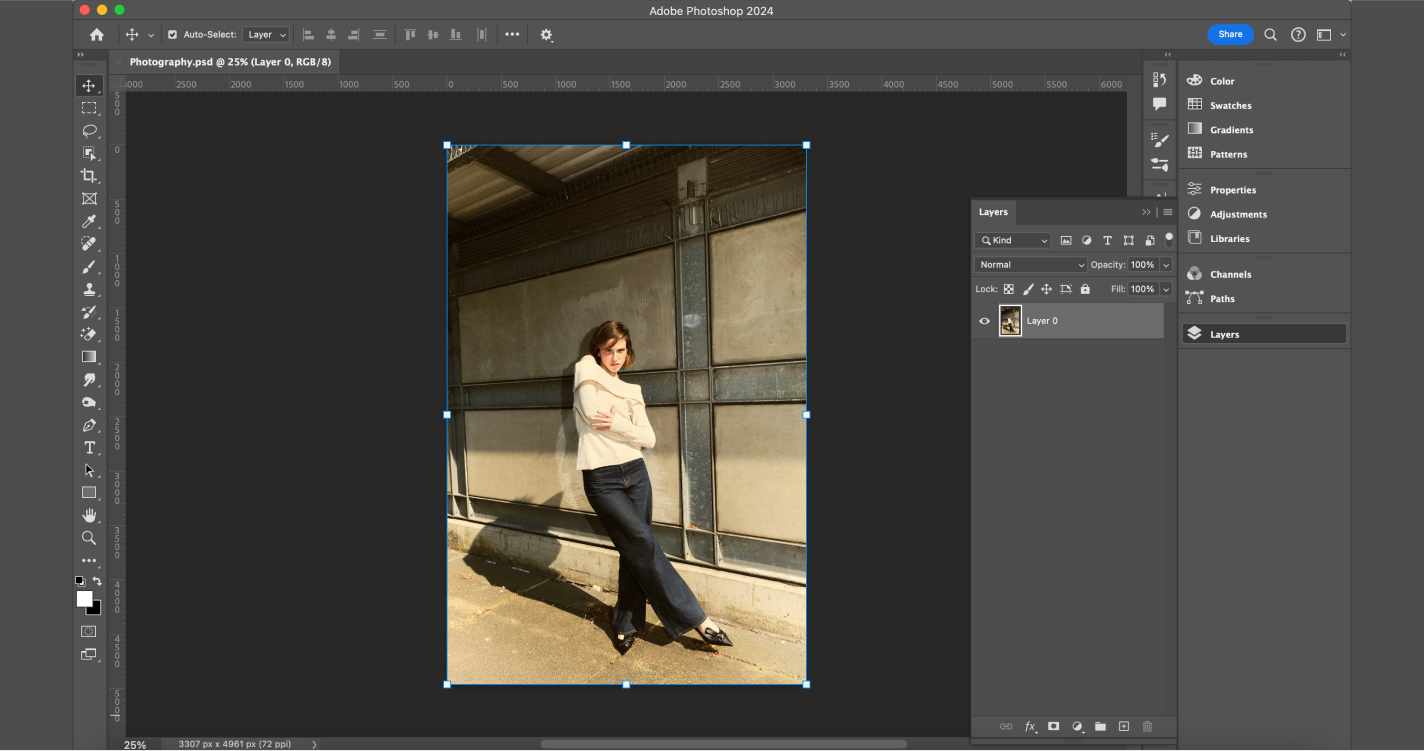
3. Open the folder where your Photologo is saved on your computer): Simply drag-and-drop the signature file into the image to be signed you have open in Photoshop’s workspace.
For darker or color-saturated images, we suggest using a white Photologo. For images with light tones or bright background, choose the black version of your logo. The good news is that your custom Photologo is made to fit a wide variety of cases, so the file you received from our studio contains multiple different versions to choose from.
To be more specific, every Photologo is delivered in the following formats and types:
– Black and White versions
– High and Low resolution (of both colors)
– In PNG file format
– With a transparent background, ready to be applied
Just pick the one that fits the most.
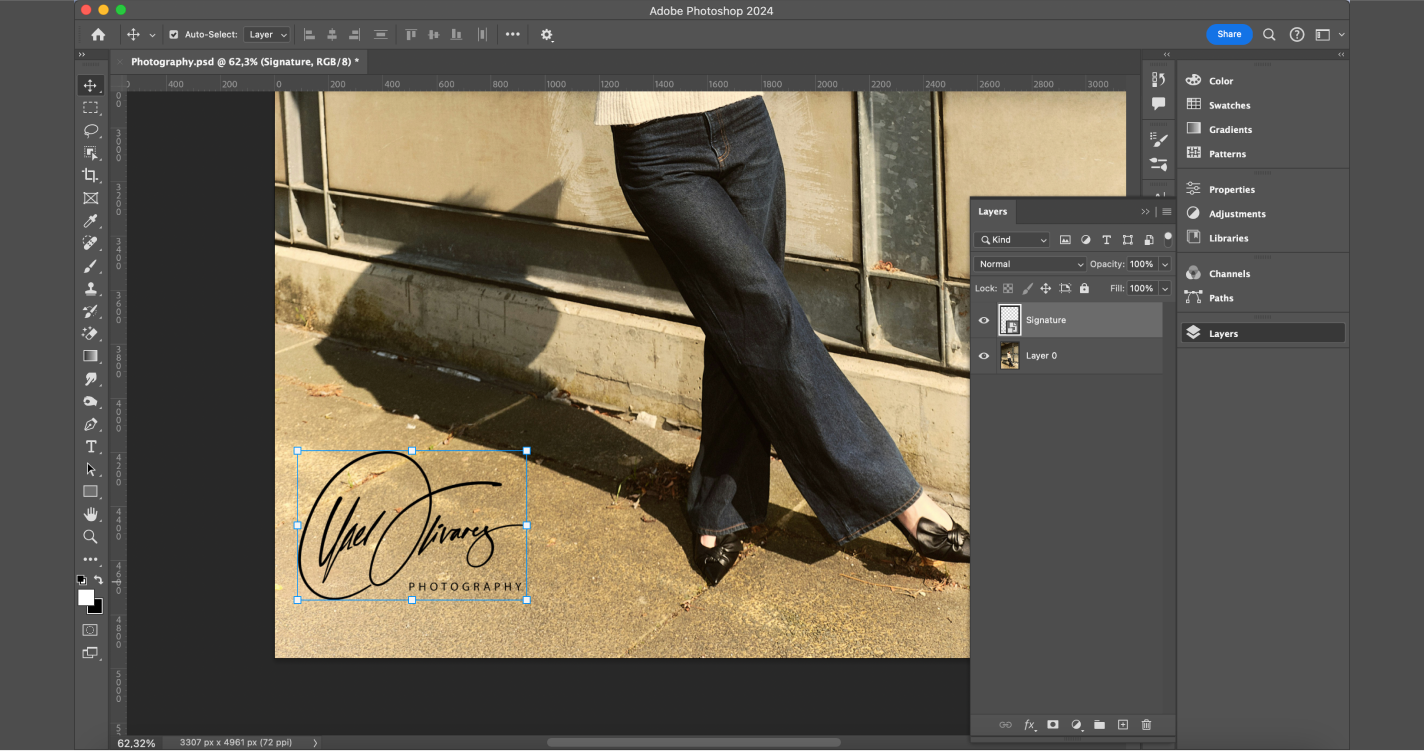
If you followed the previous steps correctly, your logo should now be placed on top of the image, in a separate layer. Now, you can adjust it to best fit the context of the picture you are signing.
Adjust the position by using the Move tool (on the toolbar, at the left side of the workspace) and move it around the image. To resize your signature logo, go to the upper menu and click Edit>Transform>Scale.
You can make your signature bigger or smaller by clicking and dragging the corners of the bounding box around it (but don’t forget to press and hold the Shift key while dragging it, to keep the correct aspect ratio) and press the Enter key when you’ve chosen the perfect size.
You are also able to regulate the opacity. To do that, select the correct layer and slide the opacity bar in the Layers tab (on the bottom right corner of the workspace) to make your signature semi-transparent.
There you go! When you’re done editing, go to the upper menu and click File>Save As, choose the file format and hit the Save button.
Your masterpiece is now signed and ready to go!
Getting Your Signature Logo:
Hiring a calligrapher: once a pricey option (think $500+), can now be yours for just $39! Get yours crafted by a pro calligrapher in 2-3 days. Below are some examples from our studio. Click here to get your unique Signature Logo.